Installing EverPanel Modular Wall Panels
Installing EverPanel is a relatively simple processes that involves laying out your floorplan, moving panels into position, and utilizing the right connectors to fasten panels together in the configuration required.
Two people can install about 100ft of wall in approximately 30 minutes, meaning that entire offices can be build from scratch in a single day, using a small team. No prior experience is required to build with EverPanel and the panels are light enough for nearly anyone to position and install.
We recommend designing your installation using our 3D builder first, and using printed instructions from the builder to help guide you on site.
BASIC INSTALLATION INSTRUCTIONS
IMPORTANT - READ THIS FIRST:
It is critical to follow installation instructions carefully and to err on the side of caution when installing panels. Be sure to always provide sufficient support columns and/or T-shaped or L-shaped returns to stabilize your wall. Always connect wall sections side-by-side using Inter-panel Connectors or zip ties to secure panels, so that they do not separate when in use. Never stack panels without sufficient lug connectors between sections. It is always advisable to watch for pinch points and to wear gloved when installing panels.
Failure to follow proper installation techniques or to secure panels properly can result in a wall section falling, potentially causing injury. If you are unsure about an installation technique, always stop and contact our team for guidance before proceeding.

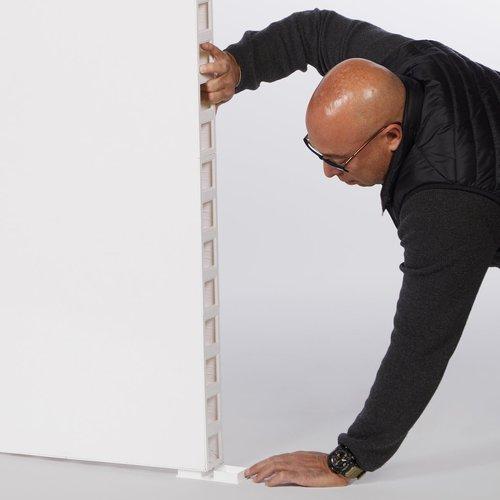
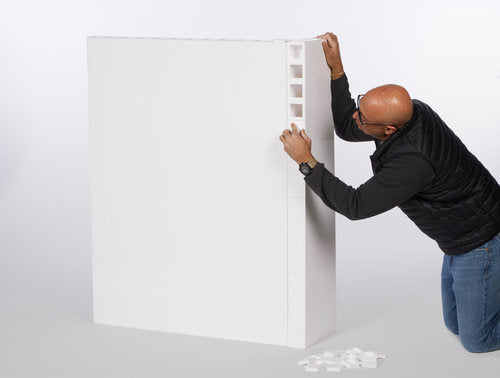
STEP 1 - POSITIONING PANELS FOR INSTALLATION
The key to a successful installation is transporting the required number of panels into their approximate position prior to beginning installation. We recommend roughly laying out a single layer of your layout prior to connecting adjacent panels and prior to stacking panels on top of panels. This will help you visualize your wall/room, check for possible issues, and make adjustments easily BEFORE you are far along in your build.
Note: Panels are not meant to span open areas (such as in a roof application) and are designed to be placed upright, only, when installed.

STEP 2 - INSTALLING INTER-PANEL LOCKING CONNECTORS UNDERNEATH PANELS
The Inter-Panel Locking Connectors come in both a Double Lug version and a Triple Lug version. When connecting two panels together side-by-side, use a double lug version. When placing an internal column or wall at 90 degrees to adjacent panels, we recommend using a triple lug version.
Start by placing Inter-Panel Locking Connectors underneath the bottom row of panels. These are designed to keep panels from pulling apart from each other.
Install the locking connectors in a straight line for a straight run of panels, or at a 90 degree angle when creating a corner.
When installing the bottom connector, simply tip the first panel and slide the connector below it and set down the panel until it snaps into place. Then, position the adjacent panel by tipping it onto the already placed Connector, until it snaps down as well.


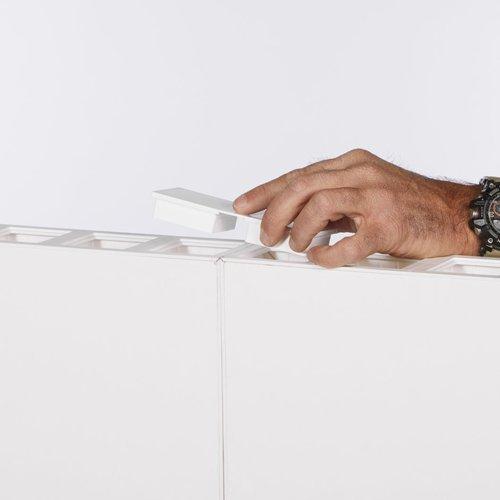
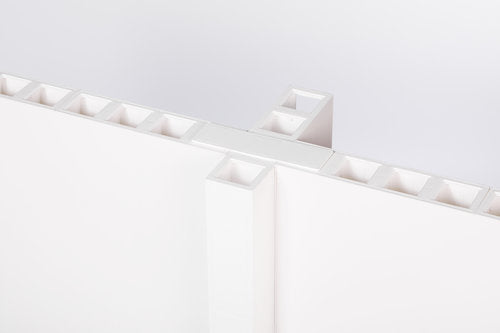
STEP 3 - INSTALLING INTER-PANEL LOCKING CONNECTORS ON TOP OF PANELS
Simply snap the Inter-Panel Locking Connectors into the receiver slots on the top of adjacent panels to fasten the panels together. This will prevent the two panels from pulling apart.
Be sure that both sides of the connector are snapped into place and cannot be easily removed.
PRO TIP: You might need to shift or nudge panels slightly up and down or front to back, until it is aligned for connection. It is also a good idea to double check that Inter-Panel Connectors are well seated into the panel before moving on, as a mis-seated connector can interfere with further connection.

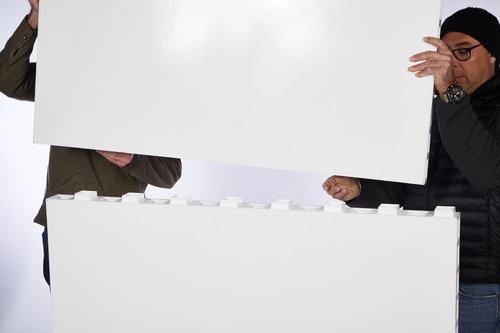
STEP 4 - LAYERING ON A SECOND ROWS OF PANELS
The EverPanel allows you to stack layers of panels to create the height wall you require. For example, for 7ft walls, simply stack a 3ft panel on top of a 4ft panel. For an 8ft wall, stack 2 4ft panels on top of each other.
To stack panels, be sure you have placed the necessary number of connector lugs on the top of the panels that comprise the row below. We suggest lugs every 2-3 receiver holes.
When installing the panel, one person should raise the panel up to the level it will be installed, while a second person helps to guide it into place both above the panel below and adjacent to any panels placed prior. Because panels fit tightly, you might need to adjust, lift, and nudge new panels into position.

STEP 5 - CONNECTING THE NEXT LAYER OF PANELS USING INTER-PANEL LOCKING CONNECTORS
Once you have placed two panels on the next row, be sure to connect them using another Inter-Panel Locking Connector (2 way or 3 way).
To lock the top row of panels to each other using Inter-Panel Locking Connectors repeat Step 4 (above). Be sure that connectors are fully snapped into place before proceeding.
IMPORTANT: Be careful of pinch points when stacking or connecting panels.
Be aware of panels at all time and do not release a panel until proper support has been provided, either in the form of an L or a T column or return, and until Inter-Panel Connectors are snapped into place (Step 5 below)

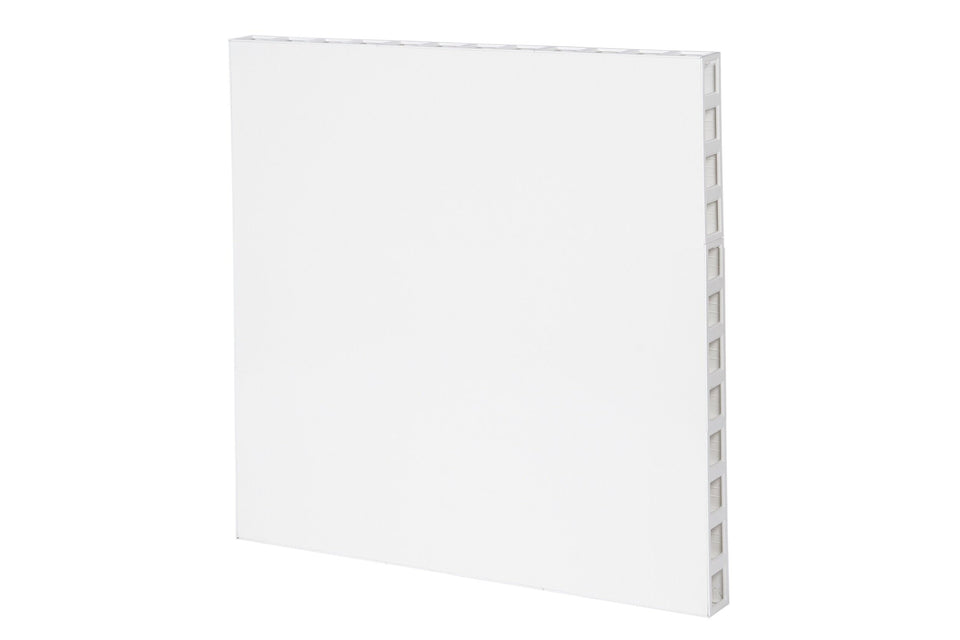
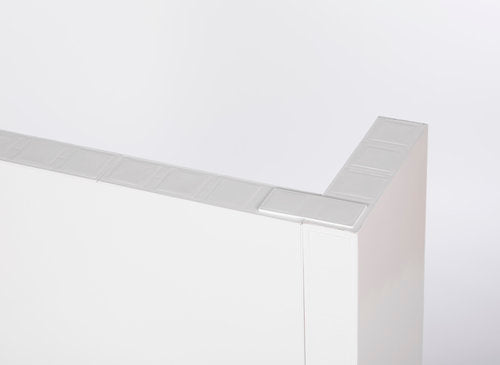
STEP 6 - INSTALLING FINISHING CAPS
Finishing caps are used to finish exposed panel edges by sealing exposed receiver holes.
Finishing caps are used on top of shorter wall installations, such as for cubicles or pony walls, as well as for the exposed ends of taller walls.
To install Finishing Caps, simply snap them into place in the open receiver hole you wish to cover. We recommend using finishing caps for the side of a 90 degree wall, where one side is exposed, as well as for the tops of walls, where you are looking for a more finishing look.
Taller walls typically do not require top finishing caps as the top of the wall is not generally visible.

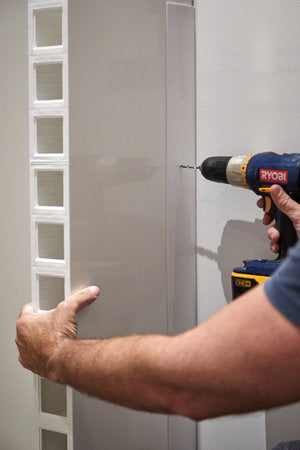
ATTACHING EVERPANEL TO FIXED WALLS, FLOORS, AND CEILINGS USING L-CHANNEL EXTRUSIONS
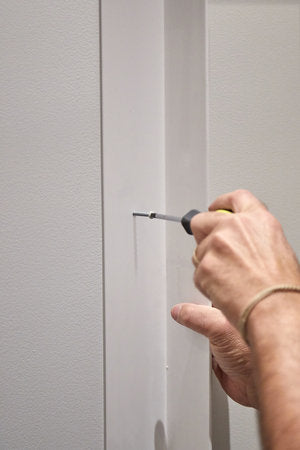
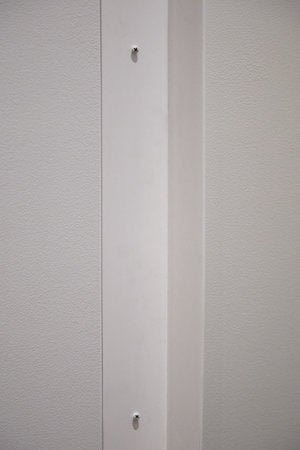
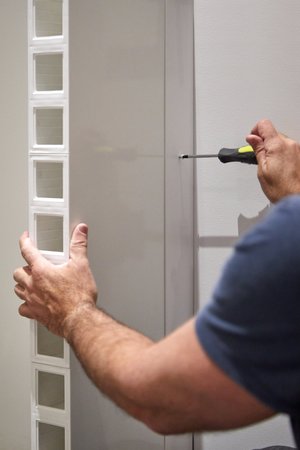
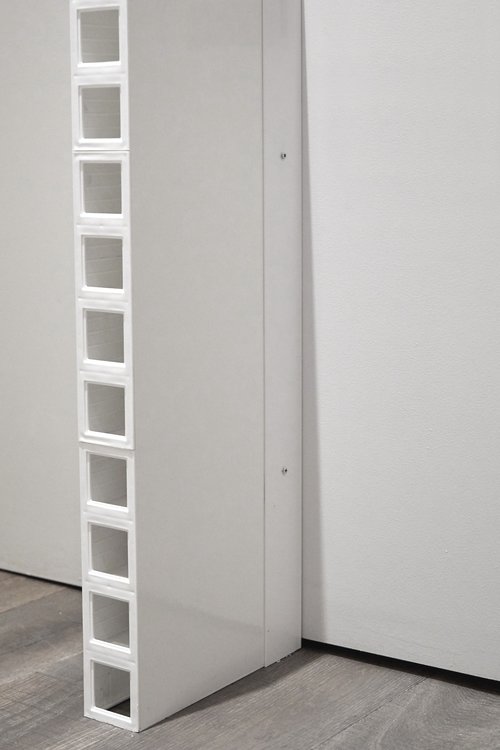
It is possible to connect EverPanel to traditional fixed walls, ceilings, or floors using either our extruded White 3” x 3” L-shaped extrusion or metal L-brackets. Simply fasten this extrusion to the permanent wall using standard screws.
Then, nest the EverPanel into the inside of the L extrusion, and screw the panel into the extrusion using a standard self-tapping screw through the outside of the extrusion and into the panel. We recommend fastening the panel to the extrusion every 2 feet or so.
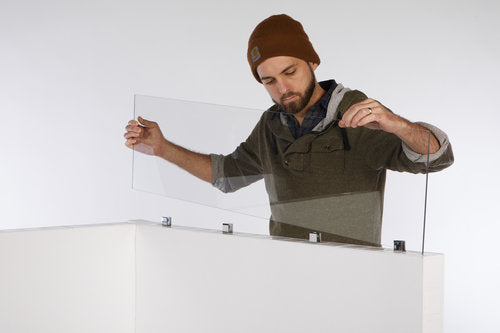
ADDING WINDOW PANELS
We offer specialized window panel kits, that allow placement of clear polycarbonate sheets on top of panels or into window openings, allowing you to create designs that allow in more light, and create a more visually interesting effect.
In order to create a standard window, use our EverPanel Mounting Caps, which are brackets fastened to standard Finishing Caps. The Mounting Caps are installed by placing them in receiver holes, just like the standard Finishing Caps. We recommend spacing Mounting Caps 2 to 3 receiver holes apart from each other and filing the once in between with standard Finishing Caps.


FURTHER INSTALLATION CONCEPTS

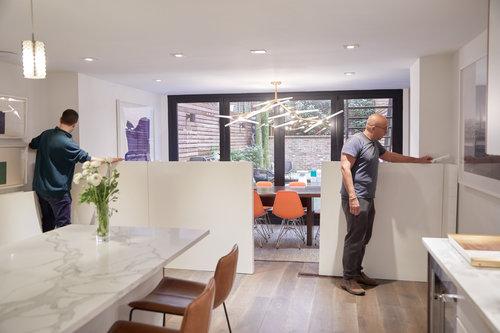
CREATING CORNERS AND USING COLUMNS FOR STABILITY
While EverPanel walls are quite stable and it is possible to briefly stand an EverPanel on its side unsupported, we highly recommend utilizing corners or columns for additional stability.
By adding a column or designing a wall in an “L” shape or a “T” shape, EverPanel becomes more stable.
Combining panels at a corner to create an L-shaped configuration.
We typically recommend inserting a column or a wall return every 3 or so free-standing panels 4ft panels. The larger the return wall, or the more often columns are used, the stronger the resistance of the overall wall is to tipping.

To install a column (1ft wide EverPanel section) or to utilize a return wall, simply turn the column or wall panel 90 degrees. Position the panels either to create an L-shaped corner, by meeting at the ends of the panels with one touching the side of the other and the other with the receiver holes exposed.
Depending on the design of your wall, you can stagger or adjust the connection point every 3 inches along the column width, to adjust the spacing of the column.
Repeat the above as needed by adding additional panels adjacent to the column or return, to continue the run of wall. It is always a good idea to terminate walls with a column, that may be positioned in a T-shape or in an L-shape.

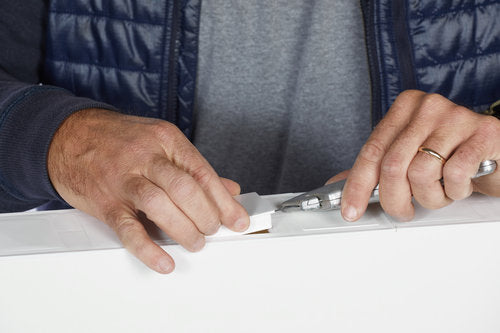
REMOVING FINISHING CAPS AND INTER-PANEL CONNECTORS
When a receiver cap is put into place, it can be removed with a razor edged knife to pry out the cap. Important: Always be careful when utilizing a razor to pry up caps.
To remove Inter-Panel Connectors, utilize a flat head screwdriver to pry connectors out.
Insert the head of the screwdriver into the notched holes on each connector and pry upward, until the snap disengages and the connector can be removed.
Due to the work involved in removing caps and connectors, we suggest thinking about placement of caps and connectors carefully before actually inserting them into the receiver holes.

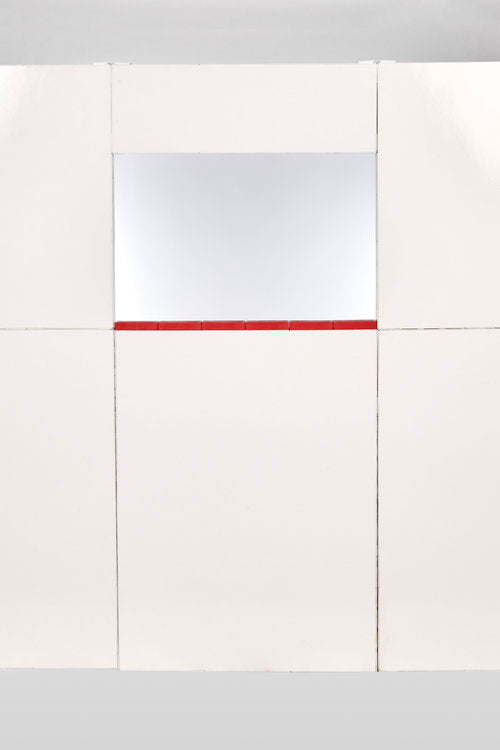
CREATING WINDOW OPENINGS
In order to create a window opening, simply leave out a panel where you desire an opening and utilize our metal Lintel section above the opening to secure it. Once in place, you can position additional EverPanel sections ON TOP of the Lintel, allowing you to continue your wall. You can also utilize shorter 3ft tall panels (3ft x 4ft) for the sections adjacent to the window opening and place the Lintel spanning between these. Then, you can place 1ft x 3ft panels to complete the additional 1ft of wall on top of the lintel and the 3ft panels, bringing the wall to the full height (as though you had 4ft x 4ft panels).
ATTACHING EVERPANELS TO WALLS

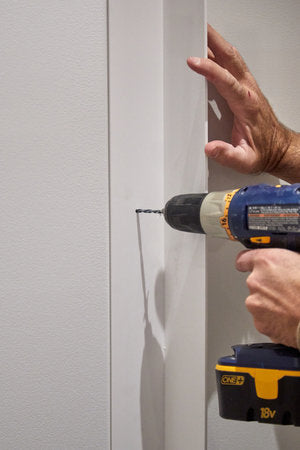


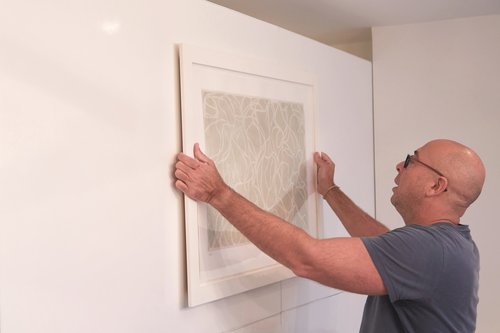
HANGING ART WORK ON EVERPANEL WALLS
It is easy to hang art work on EverPanel Walls. Simply screw into EverPanel using a suitably sized screw. Pre-drill the whole using a drill and then insert an appropriately sized hanging screw. Be sure to check that the screw is inserted solidly (not loose) before hanging artwork.
It is also important to ensure that your construction has the necessary columns, returns, supports, or fixed wall connections, to ensure a stable wall for hanging.
FASTENING EVERPANEL TO CEILINGS
Utilize the EverPanel Ceiling Bracket to fasten EverPanel to ceilings for additional stability. The EverPanel Ceiling Bracket is designed to snap into the top of a panel and then to adjust as needed (up to 2.5ft) to the ceiling above. This is ideal for free standing walls in galleries, offices, or anywhere a decorative “floating wall” effect is desired.
When installing EverPanel Ceiling Brackets, start with the 3-way clip that engages with the panel as far up the post as possible, touching the top flange. Then, insert the post and clip into the panel receiver slots until the clip snaps down into place. Slide the post upwards until it touches the ceiling and tighten the bottom locking screw to keep the post raised at the necessary height.


ALTERNATE INTER-PANEL CONNECTION METHOD
For an alternate panel connection method, you can use 4”-10” zip ties to connect panels to each other.
Simply loop 1-2 zip ties through the top and side receiver holes on the adjacent panels and cinch them, such that panels are fastened tightly. Once positioned and tightened, trim the excess length off of the zip-tie and rotate the tie so that is is not protruding.

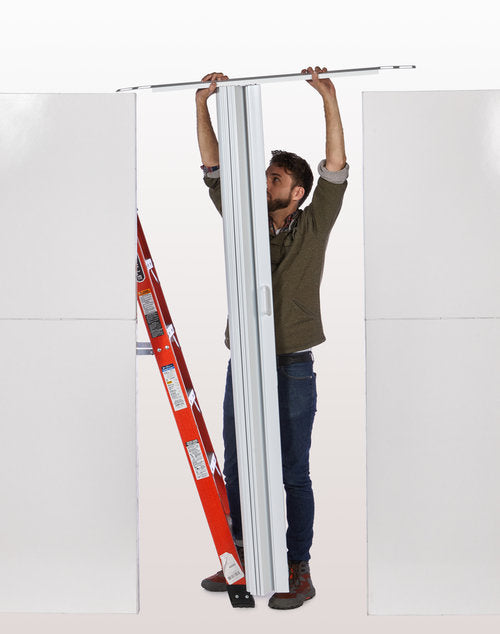
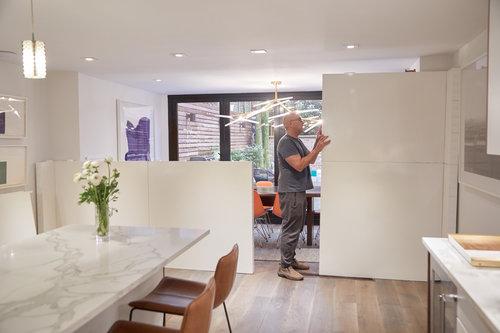
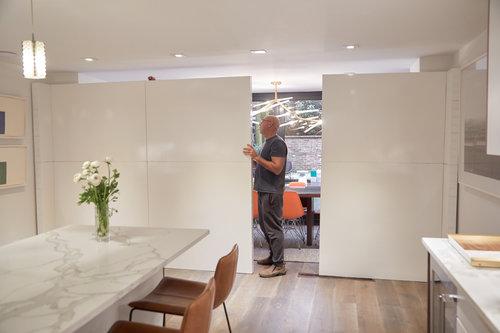
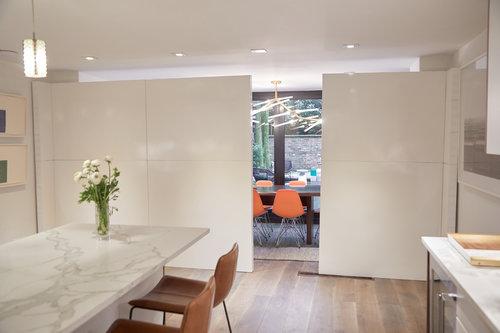
ADDING AN EVERPANEL ACCORDION DOOR
EverPanel offers a standard 36” Accordion Door Kit, which is designed to be easily installed in an EverPanel wall.
A standard Lintel (without the Accordion Door) may be used to create simple open doorways, while securing the panels on either side of the doorway to each other.
To install the Lintel alone, simply place the Lintel in place over the adjacent panels and use Finishing Caps or Lug Connectors to secure the Lintel to the panels.
To install a complete door kit, insert the slide discs located top of the accordion door into the track located on the underside of the the Lintel.
Once in place, position the lintel with door on the top of a 7ft wall, spacing the next panel 36” from the prior panel to create the space for the Lintel and Accordion Door. Secure the lintel with door to the EverPanels using Finishing Caps (or Lug Connectors or Zip Ties).

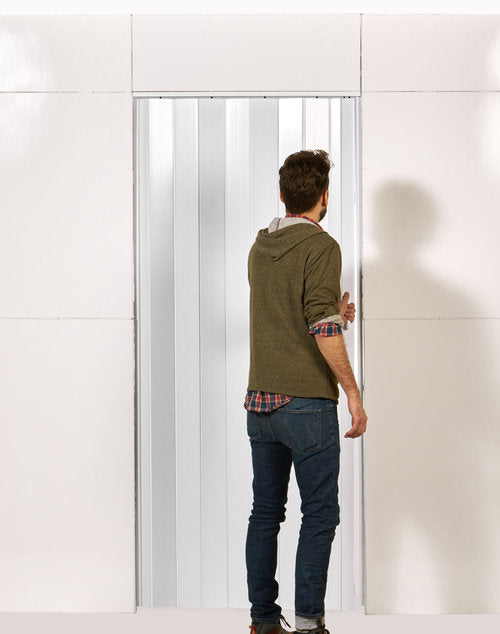
Once the doorway is hung, you can add the locking clips and receiver tracks on the sides of the doorway.
Be sure to first insert Finishing Caps along both sides of the doorway. Once caps are installed, position each locking clip and track track in the middle of opposite doorway thresholds and use the enclosed screws to fasten them to the EverPanel’s. Once attached, snap one side of the door into the locking clips. The other side fits into the track when the door is closed.
EverPanel sections incorporate a series of holes around the entire perimeter of each panel. These holes are ideal for running power, networking, and plumbing through panels and into adjacent panels, allowing you to wire a complete office as needed.
Simply feed wires into a receiver on one side of the panel and through the hollow space inside the panels until you can pull it out of a receiver on the other side of the panel. Because of the large number of holes, it is possible to run dozens of cables, as needed.

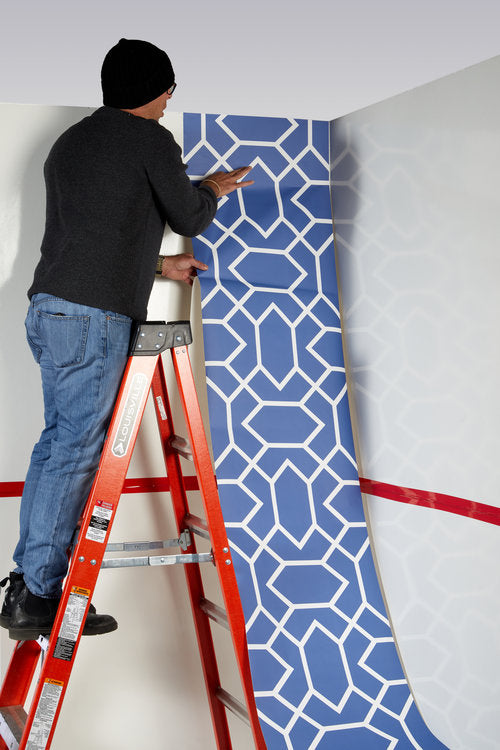
INSTALLING ADHESIVE BACKED WALLPAPER ON EVERBLOCK WALL SECTIONS
EverPanel sections are designed to received standard adhesive backed wallpaper. Note that wallpaper comes in different sizes and the repeating pattern of the wallpaper will likely repeat at a different width from the EverPanel seams.
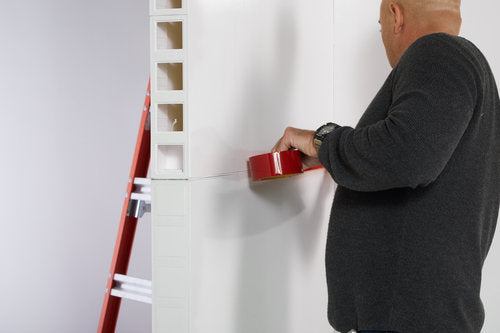
Installing a first section of adhesive backed wallpaper.
Depending on the thickness of the wallpaper, it may be possible to see indications of the panel seams underneath the wallpaper.
To prevent this, we recommend using strips of standard construction seaming tape to tape seams horizontally and vertically, eliminating the appearance of the seam beneath the wallpaper.

Install the adhesive backed wallpaper at its existing width and simply place additional sections alongside (adjacent) to the prior placed section. Carefully align seams and repeat as needed to complete your wall. Should you decide to change your decor or prefer a different style wallpaper, most adhesive backed wallpapers can be easily removed without leaving residue and replaced with another pattern.